Posts

Manuscript to Kindle format with images

Manuscript to Kindle format with images I am back after a long time with lots of learning. So pleased. I usually format manuscript to Kindle using word and calibre to convert to epub and Kindle previewer to convert it to .Mobi.       But never had any issue with justification. Yes ofcourse one or two places. But I thought those can be ignored.      Recently i had to work on a manuscript which has lot of images. And using my method alignment is not at all justified and images are too blurry even though I have 300 ppi pictures. So there i learnt the ever green htm method. Please check below steps. There are lot of ways of creating htm files using various softwares. But all those needs little advanced html, CSS knowledge. For now let's go with a simpler way. 1. Format your manuscript to a good layout suitable for Kindle.         A. Kindle needs a letter head or A4 size word layout to start with with .5" inches top,right,left and bottom margins.         B. Alwa
Working with Assets in Artboards

Working with Assets in Artboards using illustrator CC 2017 We have learnt about Working with Artboards and exporting them as pdfs in previous blog. In this blog will learn how to make use of asset panel in order to export artwork separately in various formats. Exporting assets using Asset panel: 1.  Imagine you have a .AI illustrator file with lot of icons, logos created. 2. Now instead of entire image along with background, you just need the icon as PNG which can be used to embed anywhere. Steps  1. Use Direct selection tool in illustrator and select the object and now use selection tool and select only the required object and drag it to the asset panel present next to the Artboards tab. 2. Name it for your reference. 3. You can add scale on how the output should be. We can select PNG with 300 DPI (high resolution) and jpg files too. 4. Repeat steps 1,2and 3 for all the objects you wanted the output in the form of PNG and jpg. 5. Now, use Export option in the Asset pane

How to reduce your header margin in Word

Reduce header margin in Word Why do you need different sizes of header and footer. Usually this happens with templates where it will make it easier to keep your text in the right place always. But the struggle stars when you need to place more text than the recommended dimension area. This happened with me. I struggled a lot while editing my template for paperback, where I need to keep full length copyright text instead of just 4 lines set in the template. After lot of trial and errors ,I found the way. Some suggestions over internet also helpful. Reduce header margin: 1. Lot of ways to this. But sometimes those doesn't work if this particular setting is made in the page layout. 2.Click on your header which you want to reduce the margin and make link to previous is off in Design Ribbon. 3. Go to page layout, in the break ribbon, on the right corner , click on double down arrow for additional options. 4. Choose Top in page layout tab. 5. That's it. The magi

Artboards in Illustrator CC

Working with Artboards in Adobe illustrator CC 2017 Why we go for Artboards. Artboards can be used for multime purposes. You can design multime size Artboards in a single place. For example; you can a design an A4 brochure, letter head, Business card,post card all at the same time without worry ung much about layers,duplication and resizing. I have used it for the first time for a new client request. Learnt lot of interesting facts that will be useful for those who struggle like me. Tips for Artboards: Create multiple Artboards and always name them on the layer panel. You will find Artboards tab. Name your each Artboards in an organized manner. For old versions of illustrator, you have to name them by selection the options of each board and change the name. But with new versions ,you can just double click to rename it just like do in PS layers. You can duplicate Artboards in two ways. One way on the Artboard panel, right click Duplicate Artboard. Another way is to cho

Create custom brush in Adobe illustrator CC

Custom brush creation using Adobe illustrator CC Why we need to create a brush. For example you need to create sky of stars or sky with clouds. You just can't use existing Google images as you might have copyright issues. So better we create our own brush designed and use it Royalty free. In previous blog ,i have explained about sparkle brush creation using photoshop. In this blog, you will learn custom brush shapes using illustrator. Why illustrator?. Because illustrator provides you with lot of vector designs. You can modify each part of your shape. It's really fun working with illustrator. Let's step in and learn brush creation using which you can do wonders. Creating leafy shape brush. Create an ellipse filled with black color. Select direct selection tool and you will see dragging points in your vector shape. Now hold the dragging points and turn the ellipse into a leaf shape. If you need different shape, you can just select Direct selection tool and use a

JPEG to PNG using Photoshop CC

JPEG to PNG format using Photoshop CC Why we go for PNG files. PNG files are mainly used for logos,text images where we need a transparent background. Especially when you want them embedded inside any documents. It goes very well. Where JPEGs are always with a background. Steps to convert JPEG to PNG Open Photoshop CC. Drag and drop the image to PS. Choose Magic wand for selection. Click on the background of the image. You will see full background selected excluding image. Now press Ctrl+Shift+I to inverse the selection. Or go to Select ->Inverse. Now instead of background, image gets selected. Check if any additional selections to be made. Now create Layer mask. That's it. You get the image on a transparant background. Save it as png and use it in your documents.  The same process followed to perform background removals. -Evv2017

Create sparkles using Brush in Photoshop CC

Image
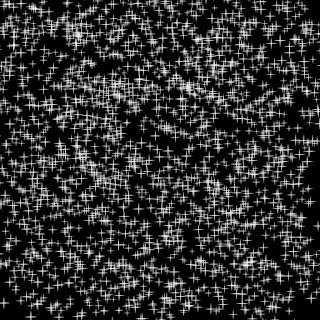
Sparkle brush creation using Photoshop CC Create sparkles brush design in Photoshop CC Create New canvas 8×5 in. Create New layer. Choose ellipse Marquee tool and create vertical ellipse.  Fill it with black color. Now go to Filter -> Blur-> Motion blur. Set angle to 90° and to Distance 232. Click OK. Now go to Filter -> Blur-> Gaussian blur Click Ok. Now select and duplicate layer and scale it verticalboth sides. Press Ctrl+E to merge both layers. Now create duplicate layer of the merged layer. Press Ctrl+T for Free Transform and rotate horizontally to represent a plus symbol Now remove background layer.You will get a transparent page with sparkle plus symbol. Now Go to Edit -> Define brush. Give a name. That's it. You have created a brush on your own. How to use this for various looks will be updated soon with a video. -Evv2017